Showing posts with label beginner. Show all posts

Monday, April 4, 2011

Pop tab Madness - DIY Pop Tab Belt


When I was a little girl my Dad would make my sisters and I belts by weaving pop tabs together with ribbon. I thought they were the coolest thing and when I started crafting heavily I wanted to use pop tabs to try and create objects that would be functional...just like my dad's belts.

Unbeknownst to me, Dad had been saving pop tabs for years! He had bags and bags of pop tabs just waiting to be turned in to eye catching works of art.

I am going to start out with a simple belt pattern. For this project you will need:

Pop tabs - for this weave you will need 12 for every 3 inches of belt
1 "Webbing in any color
2 piece grommets (and tools necessary to install)
Belt hardware
Needle and thread
2 pieces of ribbon 2x the waist measurement
Safety pins

I start out by sterilizing my pop tabs in a solution of boiling water and soap making sure to agitate them very well. For this I use a wire basket type colander.

After draining you will have a big pile of silver tabby goodness.


You want to prepare your lengths of ribbon by dabbing a bit of fray check or super glue on both ends of the ribbon. (the ends do not have to look pretty as they will be trimmed after construction).
Attach a safety pins and they will function as your "needles".


Take 2 pop tabs, placing the second on top of the first. (excuse my horrific nails).


Bring the ribbons up through both holes in pop tab #1, leaving a tails of about 6 inches. From now on you will be threading the ribbons through 2 pop tabs at a time.


Pull them nice and tight.


Now, place a third pop tab behind the second. Bring both ribbons up through the holes in tabs #2 and #3.


Continue in the same fashion until you reach the desired length. 


And the back.....


Continue until you have reached the desired length.


I use alligator clips to secure my pop tabs to the webbing while I sew them together with matching thread. Use a crochet hook or nimble fingers to secure the tails to the wrong side of the pop tab strip. Remember to leave enough webbing on one end to place the grommets.


Now it is time to place your grommets and attach the belt hardware. I found that heating a nail and melting a hole in the webbing eliminates fraying and makes placing the grommets so much easier. Just be sure and do this in a well ventilated area as the fumes are very hazardous.


These belts are fun and easy to make. Once you have the hang of pop tab weaving there is no limit to what you can create.


I am currently working on a  pop tab skirt and a backpack, feel free to email me if you are interested in those tutorials.


Saturday, April 2, 2011

Copycat Craft: Wild human hair Earrings

Several weeks ago when Gweneth Paltrow performed with Cee-lo at the Grammys she was wearing a fabulous pair of feather earrings. At first glance it appeared that they were bright pink highlights peeking through her blond locks.
After looking through my extensive stash, I found a couple pairs of human hair clip on extensions that I had purchased last Halloween and never used. With an hour and a couple beads purchased at Joann's the finished result: a pair of hip earrings.


This tutorial will show you how to make a pair of super cute hair earrings that are completely styleable.

For this project you will need:
         Human hair ( I used 14")
         2 Cone shaped end cap beads
         2 small beads
         2 crimp beads
         Beading thread (I used Wildfire)
         Glue (Tacky Glue)
         2 Split jump rings
         2 earwires


Separate your strand for your first earring.


 Tie a length of thread 12 inches long around the strand of hair approximately one inch from the end. Double knot and wrap each tail.

Wrap each tail around the strand and know tightly.

At this point I cut the strand of hair away from the barrette.


Thread the tails through the cone bead.


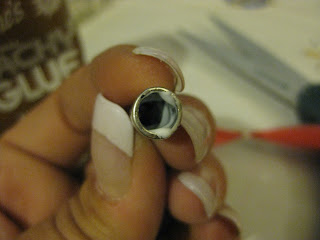
Apply a small amount of glue to the inside of the cone bead with  toothpick or needle.


Apply glue to the end of the hair strand.


Use the thread  to pull the hair tightly in to the cone bead. Gently wipe away any excess glue.


Thread the small bead....and then the crimp bead....then the jump ring.


Pass the threads through both the crimp bead and small bead. Pull everything tight...(not too tight) and use pliers to secure the crimp bead.


Attach an earwire and repeat. Trim to desired length and....Wah-LA, a pair of super hip hair earrings. They can be curled and washed.


Broken USB Charger recycled necklace

When one of my USB phone chargers stopped working, (every time I would plug it in to my PC the computer would shut down), I decided instead of throwing it in the trash I would make a necklace for a lovely carved stone skull bead my husband bought for me. It came on a thin silver chain but the heavy stone bead spins around and ends up upside down. I figured this would be a prefect way to display it while keeping it upright.

With 2 end caps, 2 jump rings and a clasp you can make a comfy necklace with a unique texture and feel.

You will need:
           2 crimping end caps,the glue-in type work as well (you will need glue if you choose that kind obviously)
           2 jump rings
           Clasp
           Needlenose pliers
           Something to snip your cord with


Start off by snipping off the ends of the cord.


Trim the inner strand of your cord by pushing down the outer layer and snipping.
Crimp the end caps around one end of the cord.

String the bead(s) and crimp the remaining end cap.

Now add your jump rings and clasp....maybe a little chain for adjustability.

To reshape a kinky cord, pull gently while you roll bettween your fingers. 

The end result is a soft rubbery necklace for the price of about 1 dollar.  


Heavy duty kitchen magnet from fabric scraps

These versatile magnets are a perfect way to use small scraps of fabric and create a strong and handy magnet. For this tutorial I am using the tiny sleeve from the shirt my youngest wore to his first day of kindergarten. Fabric magnets are a perfect way to use collars and cuffs - parts that normally don't even make it to my rag bin.


For this project you will need craft magnets. I used the very smallest (but very strong) ones. 8 for 2.99 at my local Hobby Lobby. They are about the size of the tip of a pencil eraser. They are the smaller ones pictured below.


      For this project you will need:
                   
                A strip of fabric 2in x 9in
                3 magnets
                coordinating threads
                optional buttons or other decorative bits
                pins and needle

Fold the fabric strip in half horizontally with right sides together. Sew along the raw edge.


Turn right side out.

Finish on end by folding the raw edge in and stitching closed.


Insert the 1st magnet and stitch a line to keep it in place.


Determine where the center of your magnet will be and stich a line.


Insert 2nd magnet and stitch a line to secure the magnet.

Stitch a line to hold the third magnet in place. Insert 3rd magnet and stitch raw edge closed.

Decorate as desired and you have a strong magnet that can be configured in many different ways. I use mine to hold keys, thick stacks of papers and heavy items other magnets can not.