Tuesday, April 12, 2011

The Most Difficult Project I didn't Give Up On

Ever since I first came across customized and altered My Little Ponies on sites like deviant art and craftster I have had the urge to create my own. This past weekend my youngest sister gave me 3 ponies that came in a lot of barbies she purchased for her daughter. They were dirty, tangled and worn......my favorite - objects that would otherwise end up in the garbage.

I found some helpful tips and tutorials on pony customizing here.

I choose a light pink one and decided to transform this sad, bald pink pony into an Aztec princess.


The first order of business was to dismember and clean the pony. The head is glued in place and with just a bit of encouragement it pops right off.

Next I used pliers to remove the hair.


I used a baby bottle brush to clean the head and body cavity and scrubbed them thoroughly with warm soapy water.

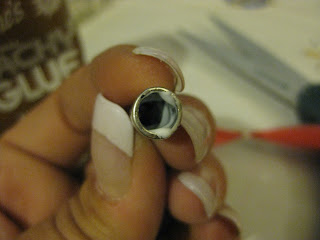
Using acetone (nail polish remover) I removed the painted details and eyes and rump.


Painting is done with a 2-1 acrylic paint and water mixture. Using a very soft brush I applied at least 12 coats of my watery paint to the pony head and body. Dyeing is another option but I decided to use things I had on hand.


After drying I painted on the details with a tiny brush and acrylic paints. I am not incredibly proficient with a paintbrush but practice make perfect......so I gave it best. I ended up removing my progress and starting over twice.

I choose a small Aztec calender for the body design and added detail to her forehead. I repainted the eyes and let the whole thing dry overnight.


Now, the nightmare. I have never rooted or worked with hair but I thought "how hard could it be"? I did have to purchase hair since I did not have any lying around. I choose 14 inch long human hair extensions in a two tone brown color. I decided that I would use thin looped wire to pull the strands of hair through the tiny holes. Pretty soon I had a tangled mess inside my pony's head and it became harder and harder to insert my strands...and there are sooo many holes! I considered throwing the whole thing in a drawer and denying it ever happened, but I kept coaxing strands of hair into those itty-bitty holes.

I was determined that I would not be beaten by a pony.


Finally after 2 days of struggling and pulling my own hair out I achieved my goal.....somewhat.


Sunday, April 10, 2011

Fantastic book find : The Blackberry Hollow Cuddly Toy Book

A while back my husband brought me home a book he found in our local library's discard shelf waiting to be taken home. The Blackberry Hollow Cuddly Toy Book by Valarie Janich (circa 1989) became an instant favorite.

Not only is the book chock full of full size patterns and step by step instructions guiding you through creating all the characters in the stories that appear throughout but the author has given permission for you to recreate her whimsical toys to sell, in small handmade quantities of course. The storybook style and full page color photographs are amusing and helpful to the process. The stories have names like "Harriet Hemlock's Book of Spells" and "The Harvest Mice go on Holiday".


Each adorable creature is represented in a smaller baby size and they have costumes that accompany the stories. I have made hedgehogs and mice so far and plan on doing owls and moles next. There are also squirrels, rabbits and the tiny pixies...they remind me of fairies without wings. I found the patterns incredibly easy to follow and even easier to customize. I used an old wool coat that had fallen victim to a stain for these little mice I also made a couple sets from craft felt and cotton for my nieces, these patterns are suited for all types of fabric.

I made Mama mouse a circle skirt and added a bit of bead trim. Baby mouse is wearing a tutu and both have blush tinted cheeks and ears and tiny roses behind each ear. I have given my previous creations away too quickly to even snap a photo but once I have enough to stage a blackberry hollow costume party I will post photos.


Currently there are 20 available on amazon.com, starting for under 1 dollar. I highly recommend adding this treasure to your library.

I am addicted to these easy to make toys and plan on creating a couple a dropping them toy society style... Maybe around the library.


Currently there are 20 for sale on amazon - used copies starting at .82 cents

Wednesday, April 6, 2011

100 and 1

Yesterday while looking for tips on taking better blog pictures I stumbled across a blog I could not stop reading. I became the 100th follower of Binge Crafter and she became my first! I was beyond excited. Binge Crafter is a lovely blog chock full of great tips (like this one), amazing projects and helpful links. I hope to someday have a blog half as fantastic as Binge Crafter.

Tuesday, April 5, 2011

Walk all day in heels

Not long ago I was watching television, something I very rarely do, when an upcoming segment on the many uses of tape caught my attention.

I was intrigued when, during the segment, I heard told that wrapping a piece of scotch tape around your 3rd and 4th toe will align the ball of your feet and make wearing heels for long periods tolerable.
I am about 5'5 and I love the extra height and the look that wearing heels gives me but the older I get the harder it is to prance around in high heels all day.

I taped my 3rd and 4th toes together and was able to walk all day in a pair of shoes I have never been able to wear for more than an hour or so. Give it a try and let me know if it works for you.

Monday, April 4, 2011

Leather scrap necklace tutorial

When a beloved leather item has finally seen the end of its days you can turn it into a fascinating and contemporary necklace. This actually began after I saw a gorgeous necklace on a model in a fashion magazine, but it's been so long I can no longer find the magazine where I first spotted the inspiration.
You can go as crazy as you want with this design and add charms, bead or other sparklies.  A lone glove, old jackets and skirts or purses are great to use and you can certainly make more than one necklace.


(Please excuse the less than stunning photography....it was late and dark and I was being impatient)


For this project you will need:
                   A scrap of leather ( I used a 5 x 3 inch piece)
                   Jump rings (I used 6.5mm)
                   Chain
                   Clasp
                   Hole punch - I am using a scrapbook eyelet punch
                   Hammer
                
I am using a large piece of reconned leather from an old chair.


I started by cutting off random chunks at acute angles.


 When I find a configuration that I like, I usually take a picture with my camera phone. Once you start moving pieces around to connect them it is easy to forget how you put them together.


Now it is time for the holes. I work on a piece of stone. You want to place something under your leather to protect your table from the punch.
Determine where your holes will need to be.


Place your hole punch on top of your leather and hammer away until you get all the way through.


You can connect your pieces as you go or punch all your holes first then connect.


I added a bit of leftover chain.


These necklaces are super comfortable. As your body warms the leather it conforms to the shape of your neck.

Pop tab Madness - DIY Pop Tab Belt


When I was a little girl my Dad would make my sisters and I belts by weaving pop tabs together with ribbon. I thought they were the coolest thing and when I started crafting heavily I wanted to use pop tabs to try and create objects that would be functional...just like my dad's belts.

Unbeknownst to me, Dad had been saving pop tabs for years! He had bags and bags of pop tabs just waiting to be turned in to eye catching works of art.

I am going to start out with a simple belt pattern. For this project you will need:

Pop tabs - for this weave you will need 12 for every 3 inches of belt
1 "Webbing in any color
2 piece grommets (and tools necessary to install)
Belt hardware
Needle and thread
2 pieces of ribbon 2x the waist measurement
Safety pins

I start out by sterilizing my pop tabs in a solution of boiling water and soap making sure to agitate them very well. For this I use a wire basket type colander.

After draining you will have a big pile of silver tabby goodness.


You want to prepare your lengths of ribbon by dabbing a bit of fray check or super glue on both ends of the ribbon. (the ends do not have to look pretty as they will be trimmed after construction).
Attach a safety pins and they will function as your "needles".


Take 2 pop tabs, placing the second on top of the first. (excuse my horrific nails).


Bring the ribbons up through both holes in pop tab #1, leaving a tails of about 6 inches. From now on you will be threading the ribbons through 2 pop tabs at a time.


Pull them nice and tight.


Now, place a third pop tab behind the second. Bring both ribbons up through the holes in tabs #2 and #3.


Continue in the same fashion until you reach the desired length. 


And the back.....


Continue until you have reached the desired length.


I use alligator clips to secure my pop tabs to the webbing while I sew them together with matching thread. Use a crochet hook or nimble fingers to secure the tails to the wrong side of the pop tab strip. Remember to leave enough webbing on one end to place the grommets.


Now it is time to place your grommets and attach the belt hardware. I found that heating a nail and melting a hole in the webbing eliminates fraying and makes placing the grommets so much easier. Just be sure and do this in a well ventilated area as the fumes are very hazardous.


These belts are fun and easy to make. Once you have the hang of pop tab weaving there is no limit to what you can create.


I am currently working on a  pop tab skirt and a backpack, feel free to email me if you are interested in those tutorials.


Saturday, April 2, 2011

Copycat Craft: Wild human hair Earrings

Several weeks ago when Gweneth Paltrow performed with Cee-lo at the Grammys she was wearing a fabulous pair of feather earrings. At first glance it appeared that they were bright pink highlights peeking through her blond locks.
After looking through my extensive stash, I found a couple pairs of human hair clip on extensions that I had purchased last Halloween and never used. With an hour and a couple beads purchased at Joann's the finished result: a pair of hip earrings.


This tutorial will show you how to make a pair of super cute hair earrings that are completely styleable.

For this project you will need:
         Human hair ( I used 14")
         2 Cone shaped end cap beads
         2 small beads
         2 crimp beads
         Beading thread (I used Wildfire)
         Glue (Tacky Glue)
         2 Split jump rings
         2 earwires


Separate your strand for your first earring.


 Tie a length of thread 12 inches long around the strand of hair approximately one inch from the end. Double knot and wrap each tail.

Wrap each tail around the strand and know tightly.

At this point I cut the strand of hair away from the barrette.


Thread the tails through the cone bead.


Apply a small amount of glue to the inside of the cone bead with  toothpick or needle.


Apply glue to the end of the hair strand.


Use the thread  to pull the hair tightly in to the cone bead. Gently wipe away any excess glue.


Thread the small bead....and then the crimp bead....then the jump ring.


Pass the threads through both the crimp bead and small bead. Pull everything tight...(not too tight) and use pliers to secure the crimp bead.


Attach an earwire and repeat. Trim to desired length and....Wah-LA, a pair of super hip hair earrings. They can be curled and washed.